Mastering Blush, Bronzer, and Highlighter Placement: A Complete Face Mapping Guide for a Sculpted Look
By Charlottetilbury | Published: 2026-06-24
Category: How-to Guides
Learn the art of face mapping for blush, bronzer, and highlighter placement. This complete makeup tutorial shows you exactly where to apply each product for a naturally sculpted, radiant finish.
Have you ever finished your makeup only to feel like something is missing? Maybe your cheeks look flat, your complexion lacks dimension, or your glow seems scattered rather than focused. The secret to a truly sculpted, professional-looking face lies in one skill: precise product placement. When you understand where to apply blush, bronzer, and highlighter according to your unique face shape, you can enhance your best features, create the illusion of lifted contours, and achieve a radiant complexion that photographs beautifully. This comprehensive face mapping guide will walk you through every step, from understanding the role of each product to mastering placement techniques for different face shapes.
Why Face Mapping Matters for a Sculpted Look
Face mapping is the strategic application of color and light to enhance your natural bone structure. Think of bronzer as your shadow, blush as your fresh flush, and highlighter as your light source. When these three elements are placed correctly, they work together to create depth, warmth, and dimension. Without proper placement, even the most luxurious products can look muddy or harsh. By learning the golden rules of face mapping, you can transform your everyday makeup routine and achieve a look that is both lifted and luminous.
Understanding Your Products: Bronzer, Blush, and Highlighter
Before we dive into placement, let's clarify the distinct role each product plays in your sculpted look.
- Bronzer: Adds warmth and shadows to create the illusion of depth. Use it to contour the hollows of your cheeks, along your jawline, and at the temples.
- Blush: Brings life and color to the apples of your cheeks. It mimics a natural flush and adds a youthful, healthy glow.
- Highlighter: Attracts light to the high points of your face—cheekbones, brow bone, cupid's bow, and the bridge of the nose—for a radiant, dewy finish.
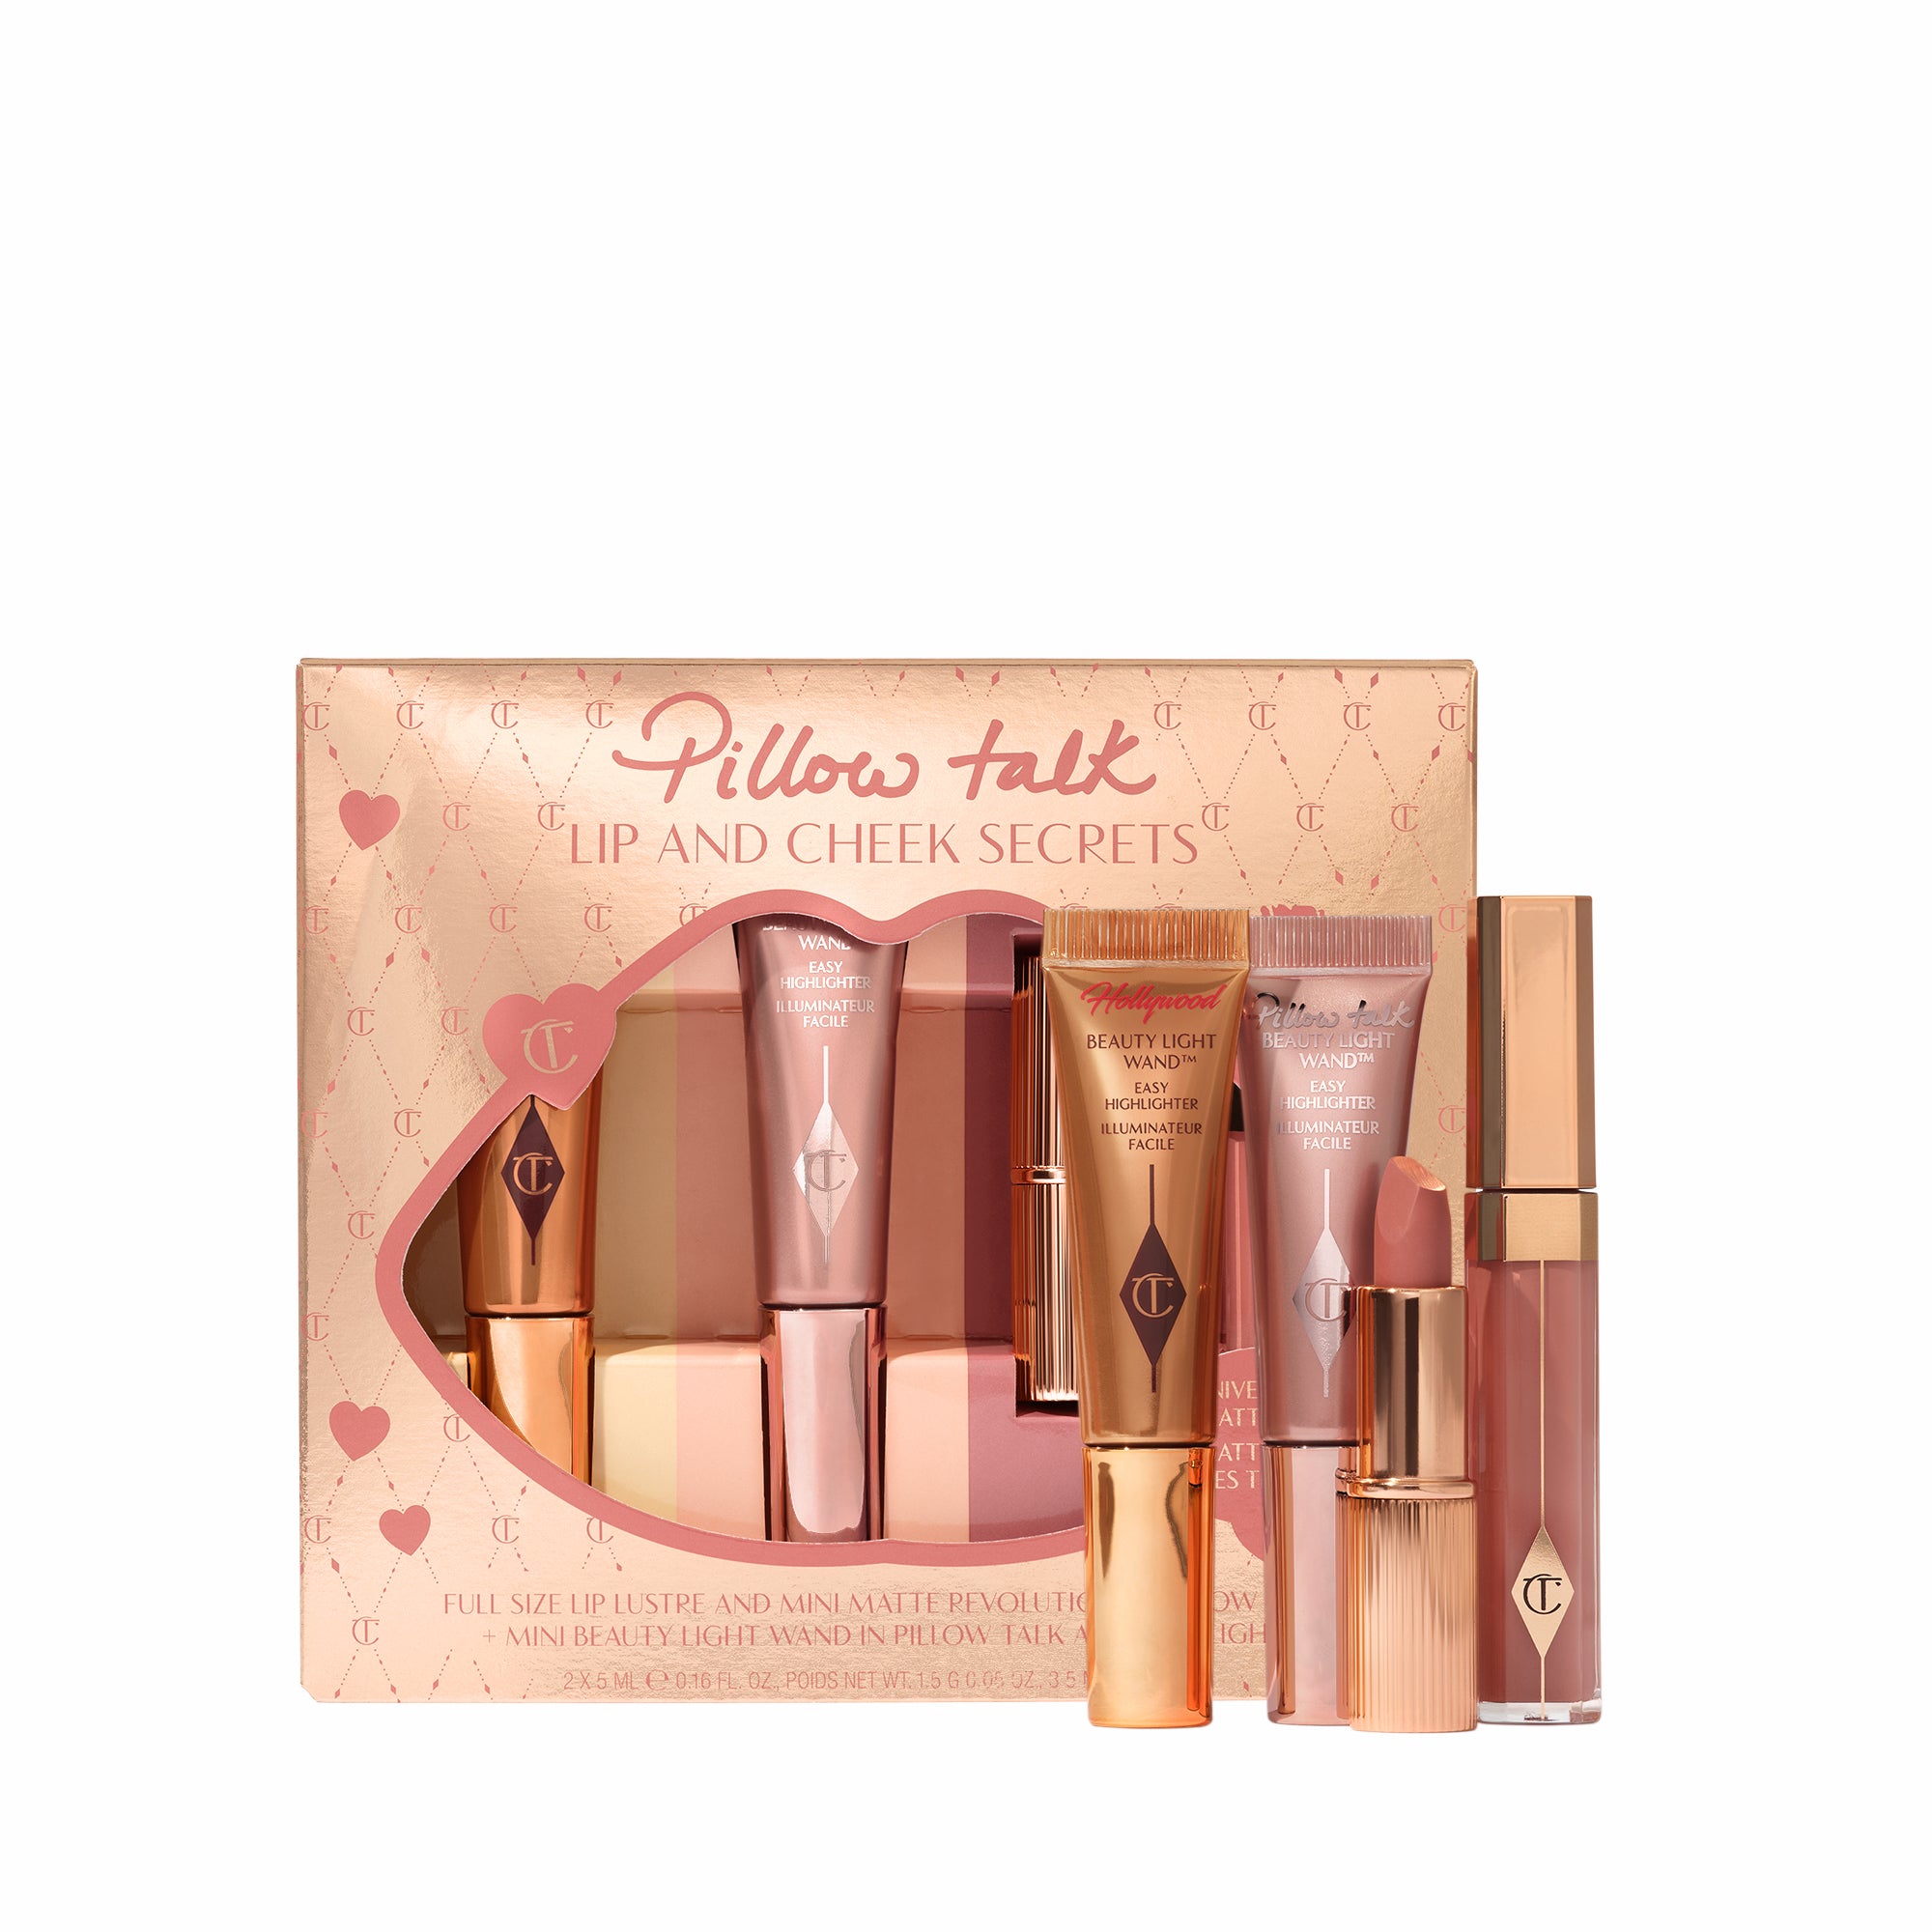
One of the most versatile ways to combine these products is with a formula that does double duty, like the PILLOW TALK LIP & CHEEK SECRETS - PILLOW TALK. This creamy duo allows you to layer blush and highlight seamlessly, making face mapping simpler and more foolproof.

The Classic Face Map: Where to Place Each Product
The following placements work beautifully for oval and heart-shaped faces, which are considered the most balanced. Adjustments for other shapes come later in this guide.
Bronzer Placement: Creating Warmth and Contour
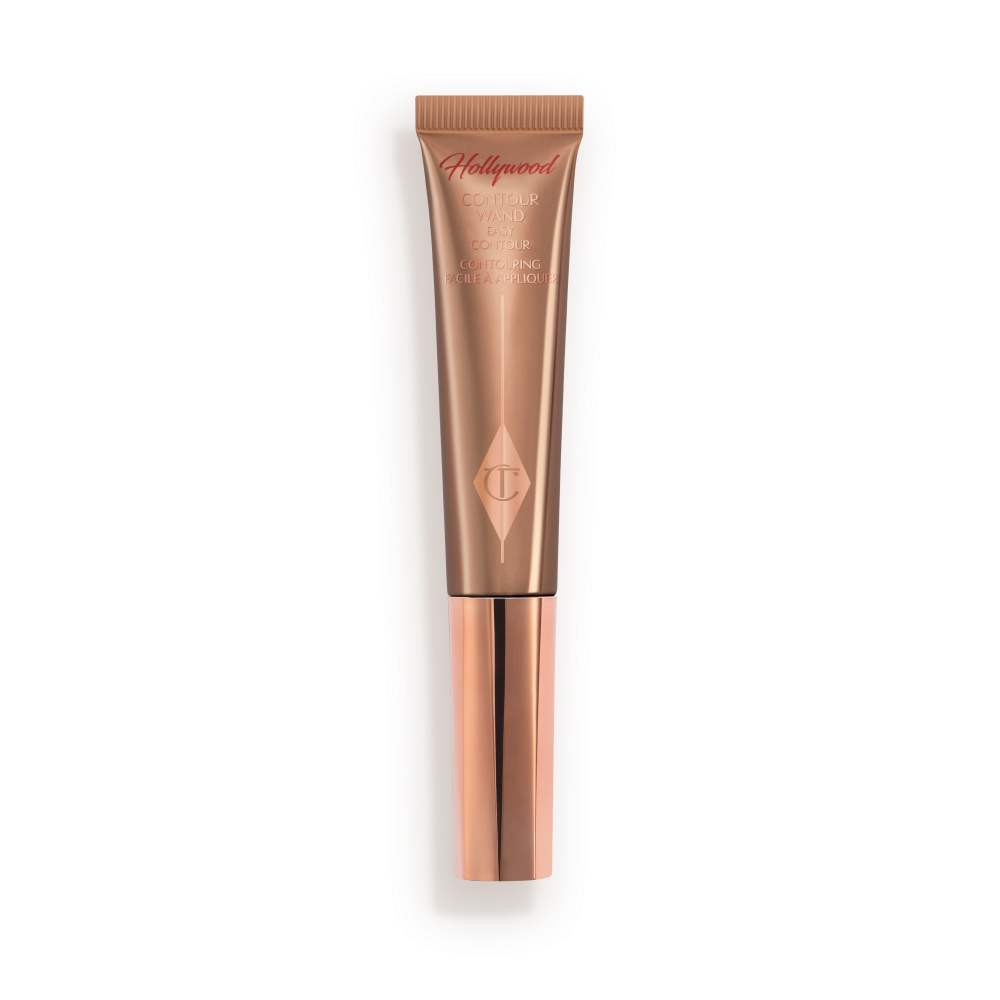
Start with your bronzer. Use a fluffy brush and a light hand. Apply in a "3" shape on each side of your face: start at your temple, sweep down along the hairline to just below your cheekbone, then trace along your jawline. This creates a natural shadow that mimics a sun-kissed effect. For a more defined contour, focus on the hollows of your cheeks—suck in your cheeks to find the natural dent, and apply bronzer just above that line. A product like the HOLLYWOOD CONTOUR WAND - FAIR-MEDIUM is perfect for this step because its precision tip allows you to draw a sharp line that you can blend out for a seamless shadow.
Blush Placement: Bringing Life to the Cheeks
Blush should be applied to the apples of your cheeks, blending upward toward your temples. Smile to find the roundest part of your cheek—that's your apple. Apply a small amount of blush there and blend in soft, circular motions. For a more lifted look, place the blush slightly higher on the cheekbone rather than directly on the apple. This technique visually lifts the face and works especially well for round or square face shapes. Cream formulas, like those found in the UNREAL JUICYLICIOUS LIP & CHEEK KIT - MAKEUP KIT, blend beautifully and give a natural, skin-like finish that never looks patchy.
Highlighter Placement: The Final Touch of Light
Highlighter goes on the highest points of your face. For the cheeks, apply to the top of your cheekbone, just above where you placed your blush. For a subtle glow, use a small fan brush and a light hand. Other key areas include your brow bone (to lift the eye area), the bridge of your nose (to create a slim, straight line), and your cupid's bow (to define the lips). Avoid placing highlighter in areas where you have texture or large pores, as it can emphasize them.
Face Shape Adjustments: How to Customize Your Placement
Not all faces are oval, and your placement should adapt to your unique structure. Here's how to modify the classic map for different face shapes.
Round Face
- Bronzer: Focus on the outer edges of your face—temples, sides of the forehead, and along the jawline. This narrows the appearance of the face.
- Blush: Apply slightly higher on the cheekbones and blend outward toward the temples. Avoid placing blush too close to the nose.
- Highlighter: Keep it minimal. Apply to the center of the forehead and chin to create vertical length, and a light touch on the cheekbones.
Square Face
- Bronzer: Soften the angles by applying bronzer to the corners of the jawline and the temples. Blend downward to create a softer look.
- Blush: Place on the apples and blend outward in a circular motion to add softness.
- Highlighter: Focus on the center of the forehead, chin, and the highest points of the cheekbones to draw attention inward.
Heart Face
- Bronzer: Apply to the temples and the lower half of the face to balance a wider forehead. A light dusting on the chin helps shorten its appearance.
- Blush: Place on the apples and blend toward the ears. Keep it soft and diffused.
- Highlighter: Highlight the cheekbones and cupid's bow. Avoid heavy highlight on the forehead.
Long Face
- Bronzer: Apply across the forehead and along the jawline to create the illusion of width. Avoid heavy contour on the hollows of the cheeks.
- Blush: Apply horizontally across the apples of the cheeks, blending outward. This visually shortens the face.
- Highlighter: Keep it on the cheekbones and avoid vertical lines on the nose or forehead.
Blending Techniques for a Seamless Finish
The difference between a professional look and a messy one often comes down to blending. Here are a few tips to ensure your face map looks seamless.
- Use the right tools: A dense, angled brush for bronzer, a fluffy tapered brush for blush, and a small fan brush for highlighter.
- Layer strategically: Always apply bronzer first, then blush, then highlighter. This order allows you to blend each layer without muddying the previous one.
- Blend with a damp sponge: For cream formulas, a damp beauty sponge can be your best friend. It presses the product into the skin rather than wiping it away, creating a natural, second-skin finish.
- Check your work in different light: Natural daylight is the most accurate. Step outside or near a window to see if your placement looks balanced.
Common Mistakes and How to Fix Them
| Mistake | Why It Happens | How to Fix It |
|---|---|---|
| Blush too low | Placing blush below the apples of the cheeks drags the face down. | Apply blush higher on the cheekbone, blending upward toward the temple. |
| Highlighter too heavy | Applying too much product or using a large brush creates a greasy look. | Use a light hand and a small fan brush. Build up slowly. |
| Bronzer too orange | Choosing a shade too warm for your skin tone or applying over too large an area. | Pick a bronzer with neutral undertones and apply only where the sun naturally hits. |
| No blending between products | Harsh lines where bronzer meets blush or highlighter look unnatural. | Use a clean brush or sponge to buff the edges between each product. |
Bringing It All Together: A Step-by-Step Face Mapping Routine
Now that you know the theory, here's a practical routine you can follow every time you do your makeup.
- Prep your skin with moisturizer and primer for a smooth canvas.
- Apply your base (foundation or tint) and set with a light powder if needed.
- Bronzer first: Sweep bronzer along your temples, cheek hollows, and jawline using the "3" shape. Blend well.
- Blush second: Smile to find the apples of your cheeks. Apply blush and blend upward toward your temples.
- Highlighter last: Tap a small amount onto the tops of your cheekbones, brow bone, cupid's bow, and the bridge of your nose.
- Set and refine: Use a setting spray to meld all layers together, then check your face map in natural light. Adjust if needed.
If you're new to face mapping, practicing with a versatile kit can make the process much easier. The UNREAL JUICYLICIOUS LIP & CHEEK KIT - MAKEUP KIT includes both a glossy lip and a creamy blush, allowing you to perfect your placement while keeping your routine streamlined. The cream blush formula blends effortlessly and can be layered for intensity, making it ideal for experimenting with different placements.
Final Thoughts: Confidence Through Technique
Mastering blush, bronzer, and highlighter placement is one of the most rewarding makeup skills you can develop. It takes practice, but once you understand the principles of face mapping, you can adapt them to any product, any occasion, and any face shape. Start with the classic placements, then tweak them based on your unique features. Over time, you'll develop an intuitive sense of where each product belongs, and your sculpted look will become second nature.
Ready to put your new knowledge into action? Explore the PILLOW TALK LIP & CHEEK SECRETS - PILLOW TALK to add a perfectly coordinated blush and highlighter duo to your collection, and start practicing your face map today. With the right placement and the right products, a sculpted, radiant look is always within reach.