How to Master the Art of Highlighting with Liquid and Cream Formulas for a Natural Glow
By Charlottetilbury | Published: 2026-06-22
Category: How-to Guides
Learn expert techniques for applying liquid and cream highlighters, from placement to blending. Discover how to achieve a radiant, second-skin glow with pro tips and product recommendations.
The quest for a luminous, dewy complexion has made liquid and cream highlighters a staple in modern makeup routines. Unlike traditional powder highlighters, which can sometimes appear chalky or settle into fine lines, liquid and cream formulas meld seamlessly with the skin, delivering a natural, lit-from-within glow. Whether you're a beauty novice or a seasoned pro, mastering the art of highlighting with these textures can elevate your look from flat to flawless. In this guide, we'll explore the best techniques, application tools, and product pairings to help you achieve a radiant finish that lasts all day.
Why Choose Liquid and Cream Highlighters Over Powders?
Liquid and cream highlighters offer a versatility that powders often can't match. Their buildable nature allows you to control the intensity, from a subtle sheen to a blinding beam. Because they blend into the skin rather than sitting on top, they create a more realistic glow—think of the way light naturally catches on hydrated, healthy skin. Additionally, these formulas are ideal for dry or mature skin types, as they add moisture and luminosity without emphasizing texture. For those who prefer a dewy aesthetic, liquid and cream highlighters are non-negotiable.
Essential Tools for Flawless Highlighting
To get the most out of your liquid or cream highlighter, the right tools make all the difference. Here are the top applicators to consider:
- Fingertips: The warmth of your fingers helps melt the product into the skin for a seamless finish. Ideal for precise placement on small areas like the cupid's bow or brow bone.
- Damp Beauty Sponge: A sponge ensures a diffused, airbrushed effect, perfect for all-over glow or when layering over foundation.
- Synthetic Brush: A flat, synthetic brush (like a stippling or fan brush) allows you to sweep the product over larger areas, such as the cheekbones, with control and without absorbing too much product.
Step-by-Step Application Techniques
1. Prep Your Canvas
Start with a well-hydrated, primed base. A glowing complexion begins with skincare. Use a moisturizing primer to create a smooth surface—this helps the highlighter glide on evenly and prevents patchiness. For an extra boost of radiance, mix a drop of liquid highlighter with your foundation or primer for an all-over luminous effect.
2. Choose the Right Placement
The classic high points of the face are where light naturally hits: the tops of the cheekbones, the bridge of the nose, the cupid's bow, the brow bone, and the inner corners of the eyes. For a more sculpted look, apply highlighter just above the arch of your brow and along the center of your chin. If you want to minimize the appearance of a wider nose, highlight only the bridge and avoid the nostrils.
3. Apply with Precision
Using your chosen tool, dot a small amount of liquid or cream highlighter onto the desired areas. Start with a light hand—you can always build up the intensity. Gently tap or stipple the product outward to blend the edges into your foundation or bare skin. Avoid dragging, as this can disturb the base underneath.
4. Layer for Intensity
For a more dramatic, editorial glow, allow the first layer to dry for a few seconds, then apply a second layer. Cream highlighters are especially forgiving for layering because they don't dry down as quickly as liquids. For a subtle daytime look, one layer is sufficient.
5. Set with a Mist
To lock in your glow and remove any powdery residue, finish with a setting spray. This step melds all the layers together and ensures your highlighter stays put without fading or creasing throughout the day.
Pro Tips for Different Skin Types
- Oily Skin: Use a mattifying primer on the T-zone before applying highlighter only on the high points. Opt for cream formulas that are oil-free or have a balm-like consistency. Avoid applying too close to the nose or forehead, where excess oil tends to break through.
- Dry Skin: Embrace liquid highlighters with hydrating ingredients like hyaluronic acid or glycerin. Mix a drop into your moisturizer or foundation for an all-day dewy finish. Cream sticks are also excellent for adding a moisture-rich glow.
- Mature Skin: Steer clear of chunky glitter particles. Instead, choose liquid or cream highlighters with a finely milled, pearlescent shimmer. Apply with a damp sponge for a soft-focus effect that blurs fine lines and wrinkles.
- Acne-Prone Skin: Use a non-comedogenic formula and apply sparingly. Focus on the cheekbones and brow bones, avoiding areas with active breakouts. A liquid highlighter can be a safer bet than cream if you're concerned about pore-clogging.
How to Pair Highlighters with Other Products
Highlighting is just one part of a cohesive makeup look. Here's how to combine your favorite glow-enhancing products for a harmonious finish:
- With Foundation: Apply liquid highlighter before or after foundation. Pre-foundation gives a subtle, all-over glow; post-foundation provides targeted intensity. For a dewy base, mix a drop of highlighter with your foundation.
- With Concealer: Use a small amount of highlighter on the inner corners of the eyes to brighten and open up the gaze, complementing your concealer's brightening effect.
- With Bronzer and Blush: Apply bronzer in the hollows of the cheeks, blush on the apples, and highlighter on the tops of the cheekbones. The contrast creates dimension. For a monochromatic look, try a cream blush and highlighter duo.
Recommended Products for a Pro-Level Glow
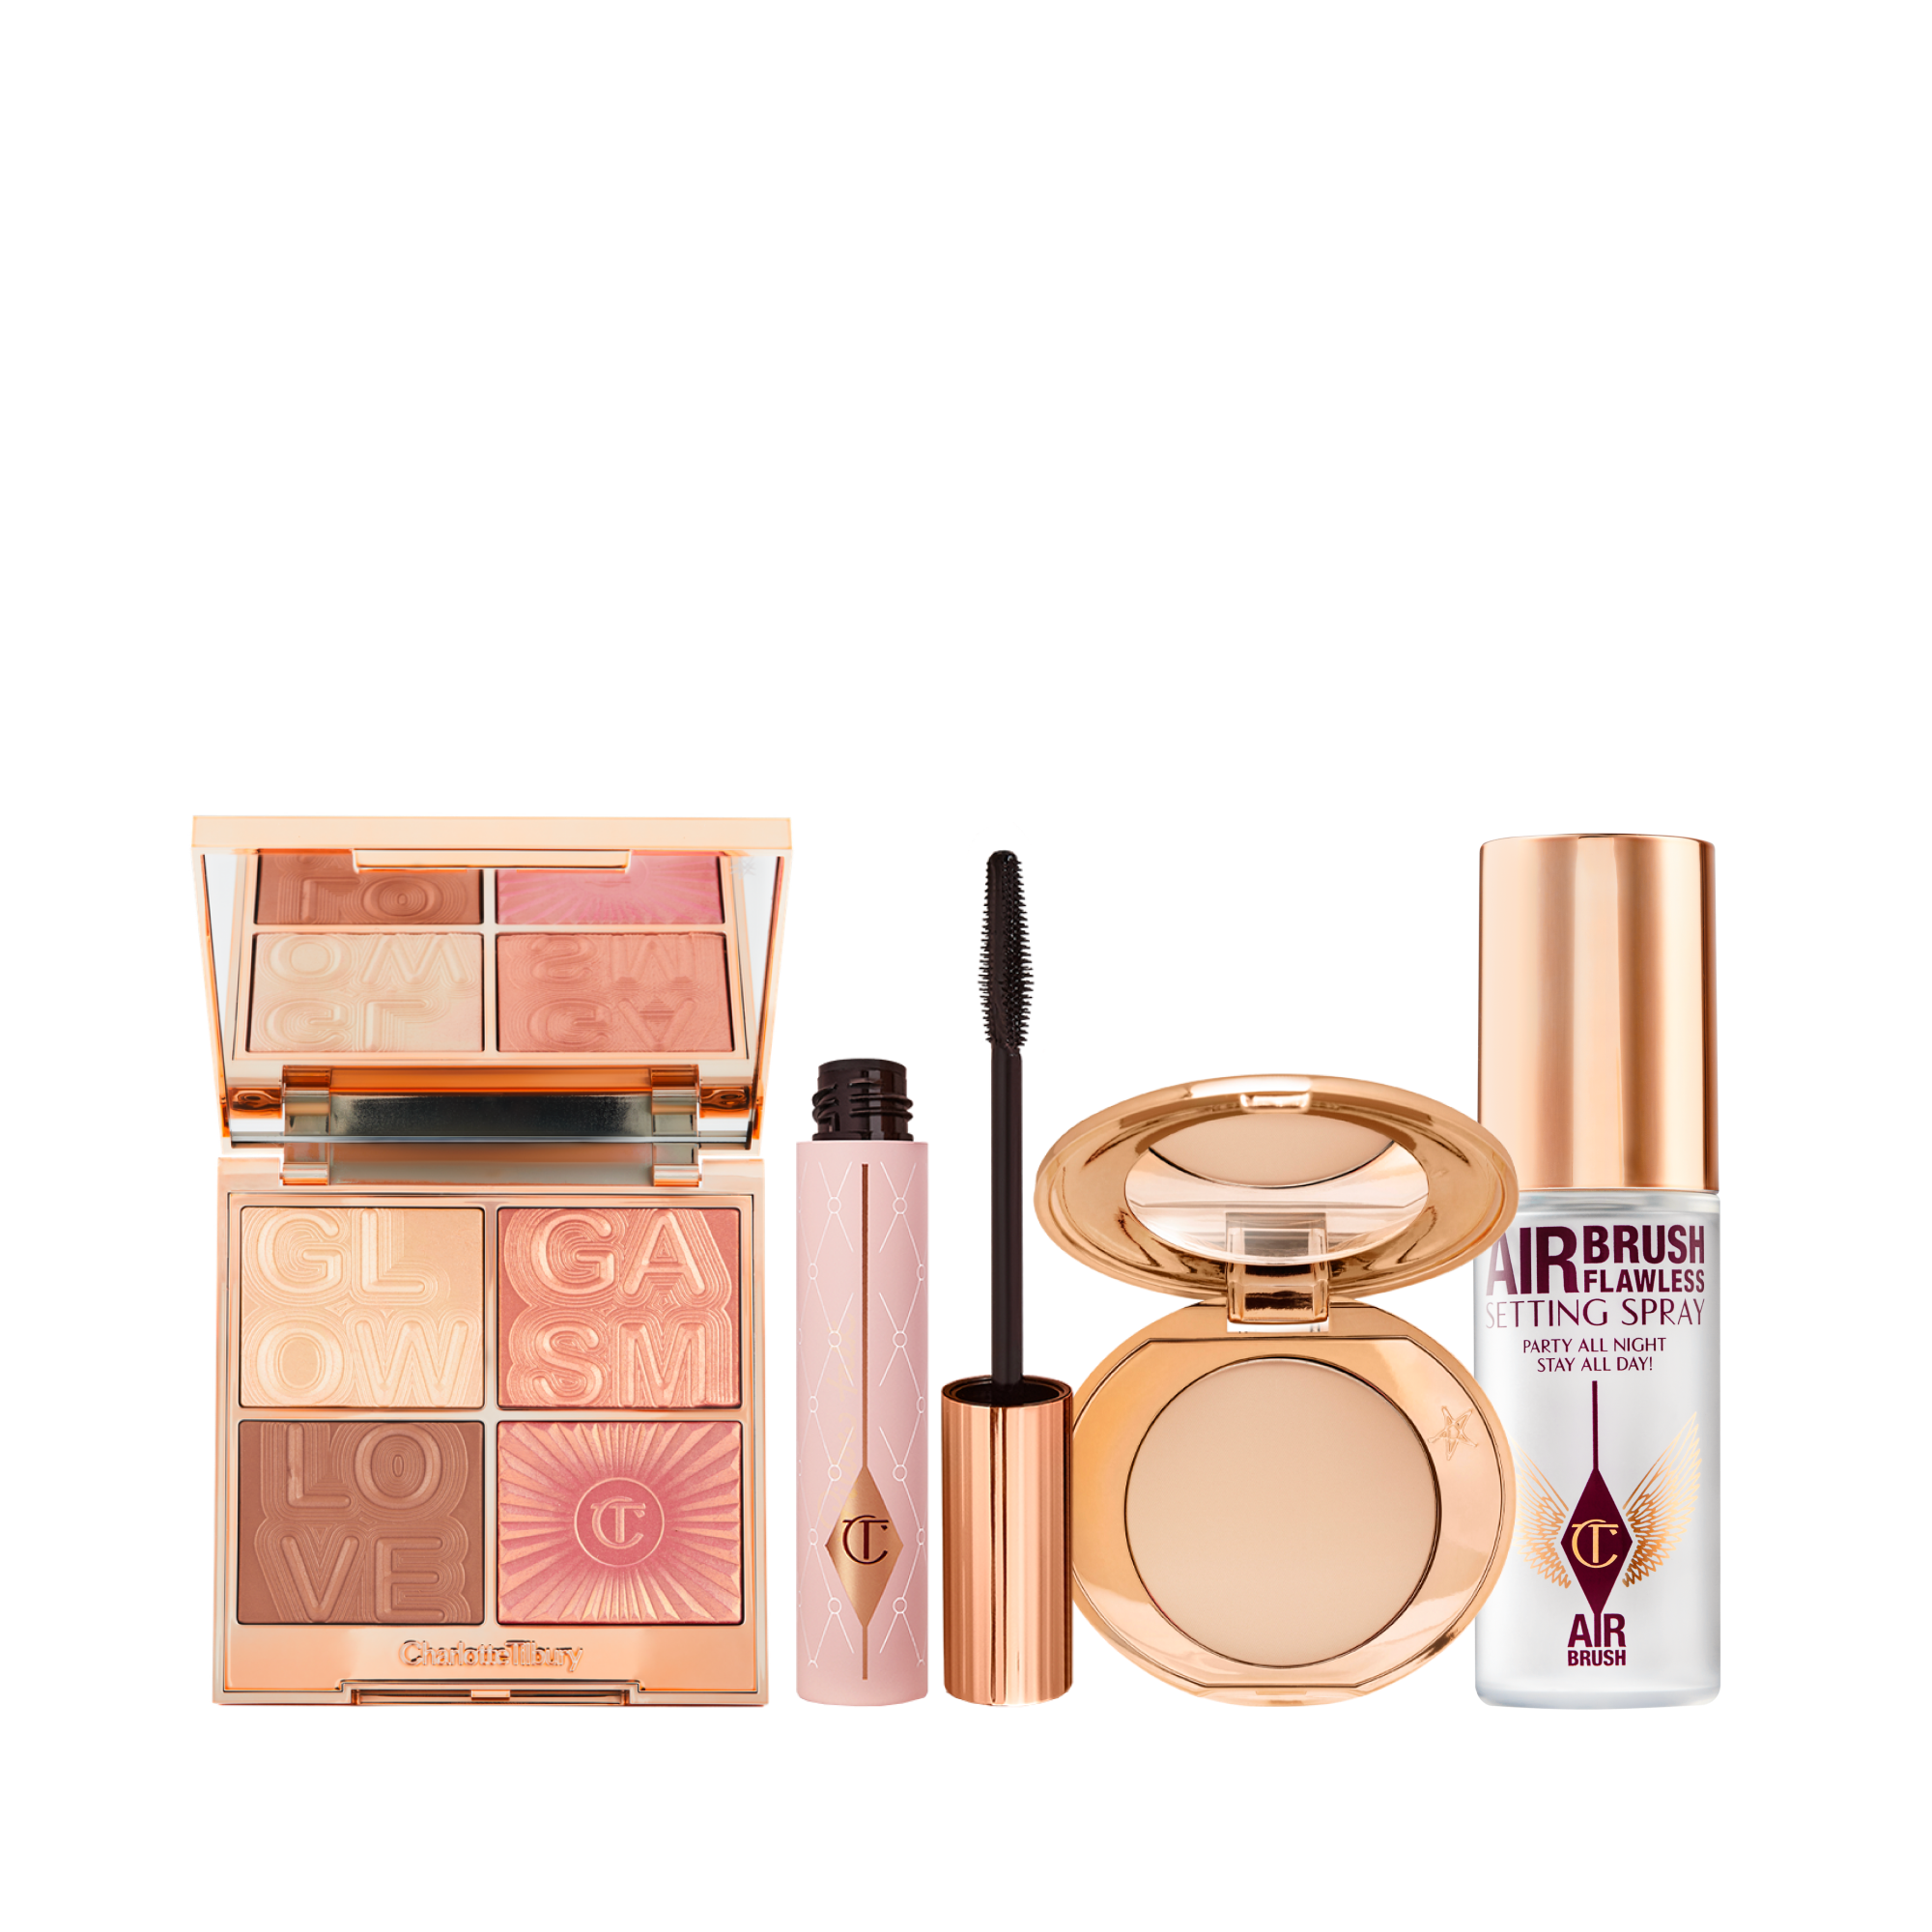
When it comes to achieving that coveted, radiant finish, the right products can make all the difference. CHARLOTTE’S LEGENDARY BEAUTY ICONS - MAKEUP & SKINCARE KIT is a brilliant starting point for anyone looking to curate a glow-focused routine. This kit includes a selection of best-selling essentials that work harmoniously to create a luminous complexion, from a Hollywood-worthy base to a finishing touch of light. For a targeted highlighting experience, the THE SECRET TO LOVE KIT - LIMITED EDITION FRAGRANCE & LIP KIT—while primarily a fragrance and lip duo—demonstrates the brand's commitment to multi-sensory beauty that enhances your natural radiance.
Integrating Highlighters into Your Routine
If you're new to liquid and cream highlighters, start by adding one product to your existing routine. For example, after applying your foundation and concealer, dab a cream highlighter onto your cheekbones with your ring finger. Over time, you can experiment with more advanced techniques, like strobing (a technique where highlighter is used as the main contouring product) or mixing highlighter with body lotion for an all-over glow on exposed skin.
Common Mistakes to Avoid
- Applying Too Much: A little goes a long way. Start with a pea-sized amount and build up. Excess product can look greasy or settle into pores.
- Using the Wrong Shade: Choose a highlighter that complements your skin tone. Fair skin looks best with champagne or pearl tones; medium skin suits rose gold or peach; deep skin glows with bronze or gold. Avoid shades that are too light or too dark, as they can appear ashy or muddy.
- Neglecting to Blend: Harsh lines are a telltale sign of unblended highlighter. Use a clean sponge or brush to soften edges, especially near the hairline or jaw.
- Applying Over Powder: Cream and liquid highlighters work best on a fresh, cream-based complexion. If you've already set your face with powder, the highlighter may not blend well and could look patchy. If you must apply over powder, use a damp sponge and a light hand.
Frequently Asked Questions
Can I use liquid highlighter on bare skin?
Absolutely! In fact, many people prefer to apply liquid highlighter on a clean, moisturized face for a “no-makeup” glow. Just ensure your skincare is fully absorbed before application to prevent pilling.
How do I make my highlighter last all day?
Set your highlighter with a translucent powder only on the edges, or use a setting spray to lock everything in place. Avoid touching your face throughout the day to prevent fading.
What's the difference between liquid and cream highlighter?
Liquid highlighters are typically more fluid and can be mixed with other products. Cream highlighters have a thicker, balm-like consistency that adheres well to the skin. Both offer a dewy finish, but creams tend to have more staying power on oily skin.
Final Thoughts on the Glow Journey
Mastering liquid and cream highlighters is all about understanding your skin's needs and experimenting with placement. With the right tools and techniques, you can achieve a radiant, healthy-looking complexion that feels as good as it looks. Start with one product, practice blending, and soon you'll be able to create a glowing masterpiece every day.
Ready to Elevate Your Glow Game?
If you're ready to transform your makeup routine with a luminous finish, explore the CHARLOTTE’S LEGENDARY BEAUTY ICONS - MAKEUP & SKINCARE KIT, which includes everything you need to achieve a professional-level glow from the comfort of your home. Whether you're a beginner or a beauty enthusiast, this kit is your shortcut to a radiant, camera-ready complexion.